London — MI6 HQ & Q-Branch — 007 First Light Location Guide
Overview
If Iceland is the audition and Malta is the school, London — specifically the MI6 headquarters under the Thames — is where 007 First Light spends the majority of its runtime. Seven of the seventeen chapters either start, end, or live entirely inside this complex, which makes it the most varied single environment in the game. You sweep through Q-Branch as a wide-eyed recruit in Chapter 4, settle into the penthouse in Chapter 5, attend Operations briefings with M and Moneypenny, return for Q-Lab gadget testing under Q-07 Wearables, and ultimately defend the building during the finale.
The London map is best thought of as several interlocking levels: Q-Branch on one side, the Q-Lab testing chambers (Q-01 Gym, Q-03 Stress Testing, Q-07 Wearables) on another, the open Operations floor with its red-file desks, Bond’s residential penthouse, and — under it all — the MI6 utility tunnels that become the playable space for the For England finale. The variety also makes London the biggest collectible chapter cluster in the game.
Chapters set here
- Chapter 2 — A Night Out (intro) — London nightclub setup; first social-stealth assignment, “Shaken not stirred” trophy.
- Chapter 4 — The Heart of the Matter — Q-Branch and Q-Lab tour, first gadget tests.
- Chapter 5 — A New Home (London segment) — Bond’s penthouse and Cressida’s bedroom; first MI6 Intel run.
- Chapter 7 — A Matter of Considerable Delicacy — Operations floor briefing with M.
- Chapter 9 — Out of the Ashes — Third Q-Branch visit, post-Slovakia.
- Chapter 13 — Going Old School — Q-Branch back room, Aston Martin work.
- Chapter 15 — Man of the Hour — Q-Lab betrayal, Q-03 Stress Testing puzzle, cabinet code 4397.
- Chapter 17 — For England (finale) — Defend MI6, utility-tunnels sequence, Aston Martin Valhalla set piece.
Sub-areas
- Q-Branch — main gadget workshop and Q’s office
- Q-Lab — Q-01 Gym — locker climb to the maintenance hallway
- Q-Lab — Q-03 Stress Testing — car test chamber, cabinet code 4397, license plate hint
- Q-Lab — Q-07 Wearables — umbrella table, Trilby Hat changing room, Dashboard Toy table
- Operations floor — Moneypenny’s desk, M’s office, red MI6-logo TV
- Bond’s penthouse — living room, bedroom, hallway, framed nightstand photo
- MI6 utility tunnels — disable-the-fan ledge, the finale’s sewer chase
- London nightclub (Chapter 2 / 6) — bar counter, scaffolding, lighting rig
Notable collectibles here
London touches almost every collectible type. Highlights:
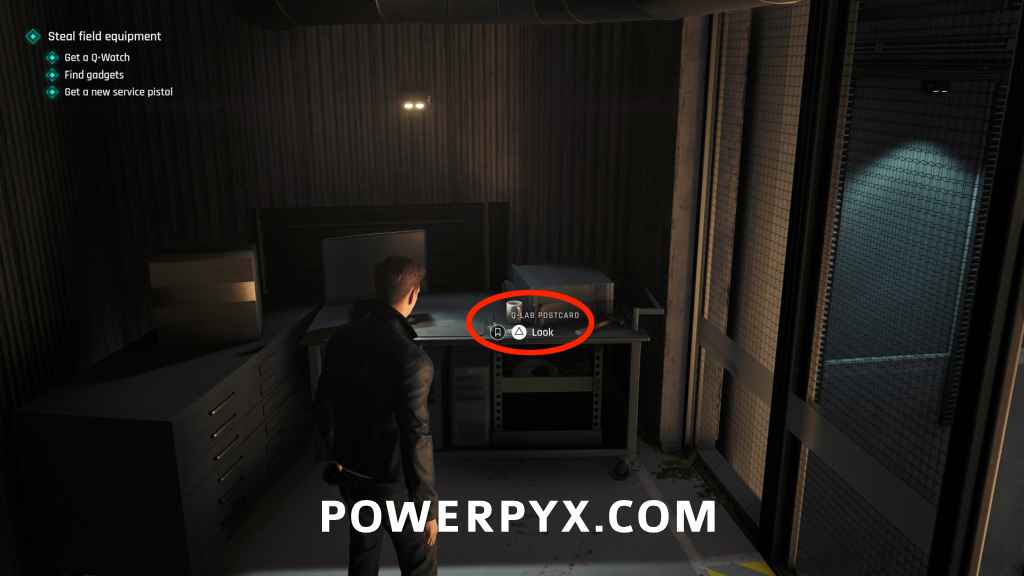
- Q-Lab Postcard (Ch.15 Q-01 Gym — climb lockers, maintenance hallway, end of corridor on the table)
- MI6 Postcard (Ch.17 Backstairs — after red phone + earpiece pickup, squeeze through bookcases)
- Cocktail Napkin Memento (Ch.6 nightclub — behind the bar counter; bluff or dart the bartender)
- Dashboard Toy Memento (Ch.17 Q-Lab Showdown — Q-07 Wearables coffee table near the red kettle)
- 9 MI6 Intel files — Selina Tan, 00 Recruits, Monroe family photo, Cressida, Arrowhead, 009 Profile, Murto twins, James Bond’s own file, Eve Moneypenny’s wallet, and more
- Trilby Hat — Legacy Item #8 (Ch.15 Q-07 Wearables changing room — Goldfinger nod)
- 9 playing cards — Under of Acorns, King of Shields, King of Bells, 8 of Bells and others spread across Q-Branch, Operations, nightclub and the utility tunnels
Related missions
- Chapter 2 — A Night Out
- Chapter 4 — The Heart of the Matter
- Chapter 7 — A Matter of Considerable Delicacy
- Chapter 17 — For England
Trophies tied to this location
- Shaken not Stirred (Bronze) — Complete first nightclub assignment. Hidden, story-tied.
- For King and Country (Gold) — Defend MI6. Hidden, story-tied — the only Gold story trophy.
- The Writing is on the Wall (Silver) — Catch Isola. Hidden, story-tied.
- Solo (Bronze) — Leave MI6 as a rogue agent. Hidden, story-tied epilogue beat.
Puzzle codes
- Q-03 cabinet —
4397(the car’s license plate)
Gallery